Chronic ear infections can often be prevented with proper cleaning and holistic care. Learn how to prevent & treat your pet’s ear infections at home.
Stinky ears and chronic ear infections are a very common problem for pet parents. So what causes stinky ears and chronic ear infections? In most cases, it’s yeast or bacteria in the ear. Often, mild ear infections in dogs and cats can be relieved or prevented with proper holistic care at home.
How to Take Charge of Your Pet’s Stinky Ears and Chronic Ear Infections at Home
Stinky ears do not always mean the ears are infected, but it can mean there is a problem brewing, and if you don’t address it, you will most likely end up with an expensive trip to the vet for treatment. Usually, stinky ears and chronic ear infections are caused by yeast and bacteria in the ear. Moisture and dirt are your enemies here. The key is to not let that yeast, bacteria, dirt, and moisture sit in your pet’s ear long enough to get an ear infection brewing.
Cleaning your pet’s ears regularly is your first and most important step to taking charge of stinky ears and chronic ear infections. How often you need to clean them is really going to depend on your pet. I would recommend cleaning the ears once a week in most cases. This will keep you on top of things. You will notice right away if there are any problems brewing that need to be addressed. However, if your pet has chronic ear problems, you will want to do it more often, maybe even daily, until you get those ears healthy again.
How to clean your pet’s ears:
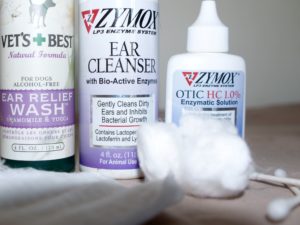
Here’s what you need to have on hand to take charge of stinky ears and chronic ear infections:
A grooming table, or other sturdy, non-skid surface to work on(See this post for more about designating a place for grooming your pet.)
Ear Powder: used for removing excess hair from the ear canal
Cotton Balls or Gauze Squares (I like the gauze squares better for really dirty ears. They have some texture to them that helps remove the gunk and dirt.)
Cotton Swabs (These are used for cleaning the little folds on the outside of the ear canal.)
Ear Wash (See the tutorial below for recommendations.)
Cleaning a healthy ear:
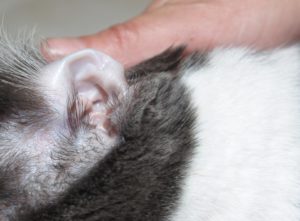
Let’s start with a healthy ear. This cat is my girl, Noodle Beans, from the header photo above (Isn’t she gorgeous?!). Her ears are nice and pink, with no redness, and not much dirt or debris. She has healthy ears and I usually clean them just once a month. I use Vet’s Best Ear Relief Wash in her ears. It is full of wonderful, natural ingredients, like chamomile and tea tree oil, and I love the way it smells. For her, I just squeeze a few drops in each ear, and wipe out with a cotton ball. If there is any dirt in the little folds around the outside of the ear canal, use a cotton swab dampened with the ear wash to wipe it away.
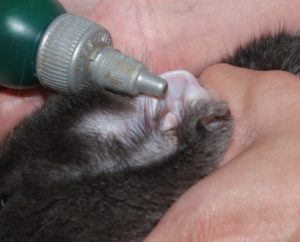
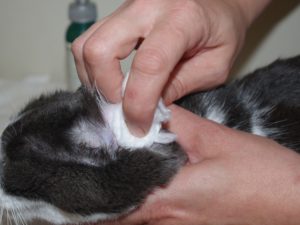
Cleaning a problem ear:
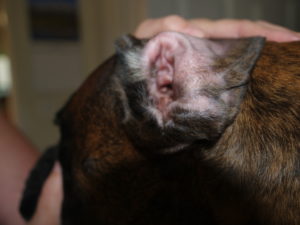
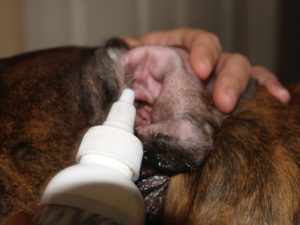
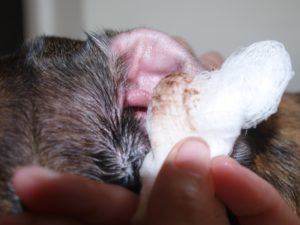
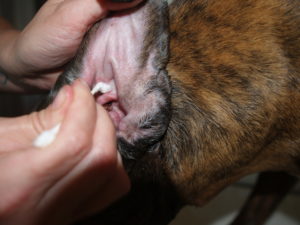
Next up is my boxer, Rocky Wilson. As handsome as he is, Rocky is the KING of stinky ears! He used to have chronic ear infections until I started caring for his ears as directed in this tutorial. As you can see in the photos below, his ear is a lot dirtier than the last ear we looked at. It’s a little bit itchy, but it’s not at all swollen, it’s not red, and it’s not painful, so he probably doesn’t have an infection at this point. Time to act, before it turns into an ear infection, and a possible vet bill! Dogs that have floppy ears tend to have more ear problems because they don’t get good air circulation in their ear canal. For him, I pull out the big guns, my all-time favorite ear wash for stinky ears, Zymox Ear Cleanser. This stuff is worth it’s weight in gold, and I would not be without it. It contains enzymes that help to destroy that yeast and bacteria we were talking about earlier. I clean his ears twice a week because if I don’t, he will get an ear infection. Prevention is key with this type of ear. To clean his ears, I fill the ear canal completely with the ear wash. Then massage the ear at the base for about 30 seconds to loosen all that deep down debris and dirt. Step back, because he is going to shake his head like a crazy dog after you do this, and ear wash is going to go everywhere! Now, use your cotton balls or gauze to wipe all the dirt and debris from the ear canal. You may have to repeat this process several times if the ears are really dirty. Once the ear canal itself is clean, use your cotton swabs, dampened with ear cleanser, to clean away all the dirt from the little folds on the outside of the ear canal.
Removing hair from the ear canal:
Now let’s move on to my poodle, Louie. He is about 13 years old, and he adores my daughter. They are inseparable! We adopted him when he was about 5 years old and he came with some bad habits. I’ve spent a lot of time working with him so that I could groom him without getting my hand bit off! I still have to muzzle him when I pluck his ears and when I want to do anything with his feet. Poodles, as well as bichons, shitzus, lhasas, maltese, yorkies, and some other breeds, grow hair in their ear canal that needs to be removed on a regular basis to allow for good airflow in the ear canal. Keeping those ears dry inside and free of dirt and debris is crucial to preventing stinky ears and ear infections.
First, squeeze some ear powder onto the hair that is growing in the ear canal. Gently pluck away the hair that is growing on the inside of the ear canal, a few hairs at a time. Be sure you are only plucking the hairs that are growing in the ear canal itself. The hair that is growing on the outside of the ear canal should be trimmed away with a clipper and a #10 blade, either by you or at the groomer’s during your dog’s regular hair cut. Once you’ve done a good job of getting the hair out of the ear canal, go ahead and clean the ear with ear wash as directed above. Louie’s ears are dirtier than normal today, so I’m going to clean them just like I did Rocky’s, above. Make sure you clean away all remaining powder in the ears. Some veterinarians believe that leaving powder in the ears can lead to ear infections, so it’s better to be safe than sorry.
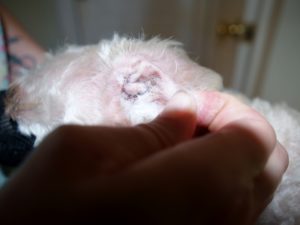
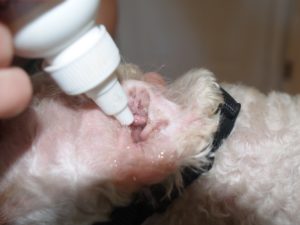
Identifying and treating a possible mild ear infection with Zymox Otic Solution:
If you are noticing your pet shaking his head a lot, itching his ears, and a little redness starting in the ear canal, chances are a mild infection is brewing in those stinky ears. You may want to try treating the ears with Zymox Otic Solution. I swear by this entire product line. It comes in three strengths, 0.5%, and 1.0% hydrocortisone, or you can also get it with no hydrocortisone. (All versions are safe for both cats and dogs, however, do not use cortisone for pets who are pregnant or nursing.) It will really depend on the severity of the problem, and whether or not you are dealing with chronic ear problems or just itchiness. I keep this product on hand at all times and use it as soon as I notice anything funky going on.
Be sure to read the package insert carefully before you use it. With this treatment, you DO NOT CLEAN THE EAR first. You fill the ear canal with the solution, massage gently, and wipe away the excess that is on the outside of the ear canal. Repeat every day for 14 days. If this treatment doesn’t clear up all signs of infection after 14 days, or it seems to be getting worse or painful, see your vet ASAP. Ear infections are painful, as well as stinky, and nobody wants their pet to suffer unnecessarily.
How to identify a full-blown infection:
If the ear is inflamed, swollen, and painful, it’s time for a trip to the vet for treatment. There’s really no getting around it once the infection has progressed to this point. They will run a cytology to determine what bacteria, yeast or other organism is causing the problem, and prescribe medication accordingly. Once you get the infection cleared up, begin cleaning your pet’s ears as directed above. Keeping those ears clean and dry inside will go a long way toward preventing the infection from returning and will also help to keep it from getting as severe, saving you money in the long run. And, as I mentioned above, if you are cleaning your pet’s ears on a consistent basis, you are going to notice stinky ears and ear infections before they become a serious problem, and be able to act quickly, saving your pet a lot of pain and suffering.
Skin Infections and Ear Infections Often Go Hand in Hand
I also want to point out that chronic skin infections and chronic ear infections usually go hand in hand. Following the nutrition protocol recommended in this post may help to keep your pet’s ear infections and skin infections at bay, especially if they are allergy-related.
Hopefully, this article has been useful in helping you take charge of your pet’s stinky ears and chronic ear infections! Please feel free to ask any questions below, or post your questions on My Facebook Page.

